 Seeking LED
How Far Apart Should LED High Bay Lights Be Spaced?
311How far apart should LED high bay lights be spaced? Learn practical spacing guidelines based on ceiling height, beam angle, and real industrial layouts.
View detailsSearch the whole station
Answer: To install an outdoor flood light, switch off the circuit, verify the wiring is dead, mount the fixture to a weather-rated box, connect ground, neutral, and hot wires correctly, seal the entry points, then restore power and aim the light.
I have installed and inspected outdoor LED fixtures in residential yards, warehouse perimeters, loading areas, and commercial exterior walls. The recurring mistake is not the wiring itself—it is choosing a mounting point that looks convenient but leaves the cable entry, junction box, or fixture exposed to water.
For a typical installation, prepare:
The fixture should be rated for the environment where it will be installed. A damp location and a location directly exposed to rain are not automatically the same application, so check the manufacturer’s installation instructions and local electrical code.
Don’t judge a flood light by wattage alone. DOE defines luminaire efficacy as light output per electrical input, measured in lumens per watt. Its current federal purchasing guidance lists 118 lm/W as the minimum efficacy requirement for floodlight luminaires covered by that program.
| Check | What to look for |
|---|---|
| Power | Correct voltage and wattage |
| Light output | Lumens, not watts alone |
| Efficacy | lm/W |
| Protection | Appropriate IP/weather rating |
| Mounting | Solid, vibration-resistant surface |
| Wiring | Correct hot, neutral and ground |
| Controls | Sensor, timer or photocell if required |
Turn off the correct breaker before touching the existing wiring. Do not rely on the wall switch alone.
I always test the conductors with a properly functioning voltage tester before disconnecting anything. If the circuit remains energized, stop there. Outdoor electrical work is not the place to troubleshoot by trial and error.
If you are extending a circuit, replacing a junction box, or dealing with unfamiliar wiring, use a licensed electrician and follow the electrical requirements applicable to your location.
Hold the fixture temporarily against the mounting surface and check its beam direction before drilling.
For a driveway, I normally aim the beam toward the working area rather than directly toward approaching drivers. For a backyard, the mounting height and beam angle should illuminate the ground without unnecessarily lighting neighboring windows.
This matters because outdoor lighting performance is not simply about total lumens. DOE notes that optical distribution and how effectively light reaches the intended target are important parts of outdoor lighting performance.
Install the electrical box according to the box and fixture manufacturer’s instructions. Use anchors appropriate for the substrate.
For masonry, ordinary drywall anchors are not enough. For exterior walls exposed to wind, vibration, and rain, the mounting hardware needs to hold the fixture securely over its service life.
Keep the cable entry facing downward or otherwise arranged according to the fixture design so water cannot easily track toward the electrical connection.
With the circuit confirmed de-energized, connect the conductors according to the fixture instructions and local code:
Do not assume wire colors are correct in an old installation. Verify the circuit and follow the applicable wiring standard.
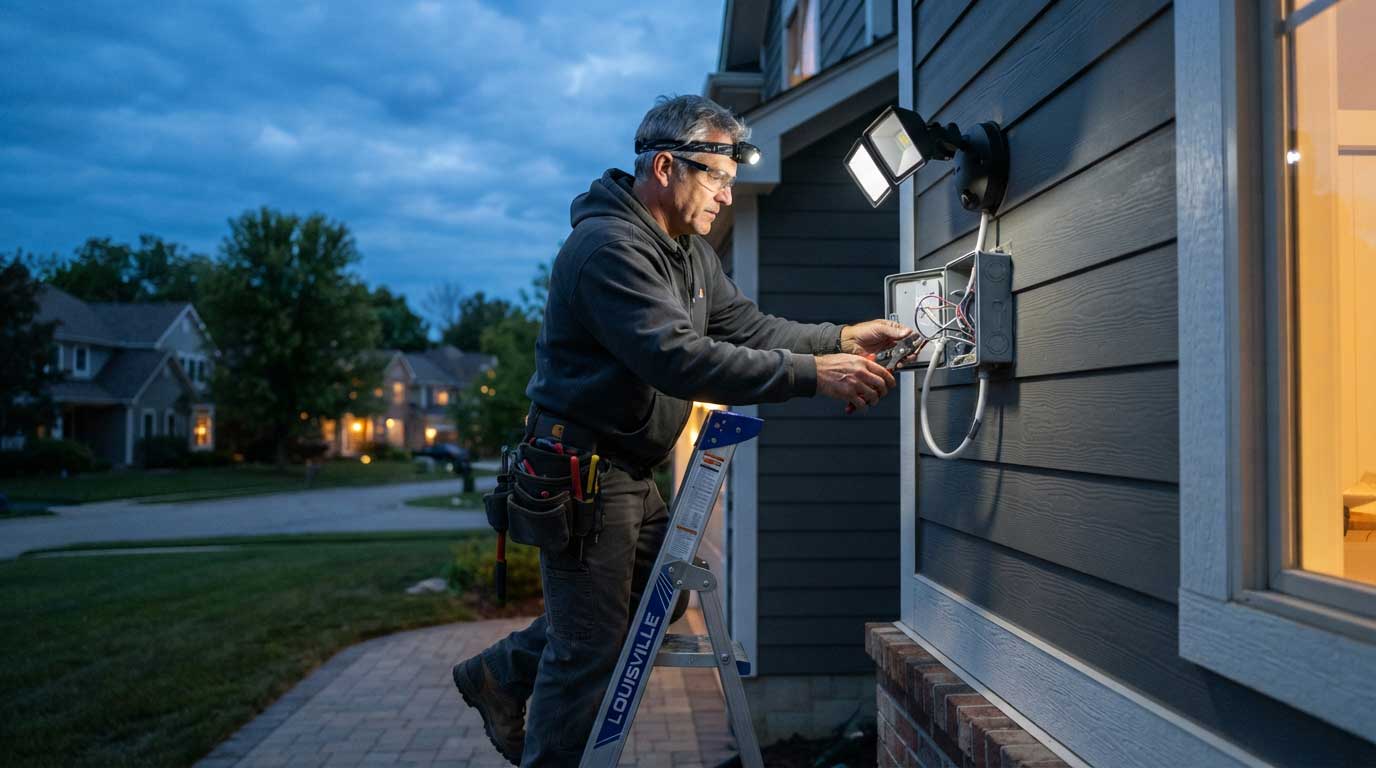
This is where many otherwise competent installations fail.
Check the junction box, conduit or cable entry, mounting surface, and fixture gasket. Water should not have an easy path into the electrical enclosure.
Do not simply cover every opening with excessive silicone. Use the manufacturer’s supplied gasket or sealing method where provided, and apply exterior sealant only where appropriate.
Restore power only after the wiring, cover, mounting hardware, and seals have been checked.
Then:
A practical detail from field installations: aiming is easier after dark than during daylight. A fixture that appears perfectly positioned at 3 p.m. can produce excessive glare once the surrounding environment becomes dark.
DOE research also shows why optical control matters: LED roadway lighting can achieve target light levels with substantially less total generated light than previous technologies, and adaptive controls can further reduce nighttime lighting levels.
| Mistake | Why it causes trouble |
|---|---|
| Mounting to weak material | Fixture can loosen or vibrate |
| Using an indoor junction box | Poor protection from weather |
| Ignoring grounding | Creates an electrical safety risk |
| Trusting wire colors blindly | Existing wiring may be non-standard |
| Over-lighting the area | Glare and wasted energy |
| Poor cable sealing | Water can reach electrical connections |
| Choosing by watts only | Wattage does not describe light distribution |
A further point worth remembering: dirt does not merely make a fixture look old. DOE field testing of seven exterior luminaires found accumulated dirt could reduce luminous intensity by more than 25% at peak angles.
Installing a replacement flood light on an existing, properly wired exterior box can be straightforward for a qualified DIYer. I would not treat the job as DIY-friendly when the installation requires a new circuit, buried cable, service-panel work, unfamiliar wiring, structural modifications, or code-sensitive wet-location work.
If you cannot positively identify the circuit conductors or verify that the circuit is de-energized, stop and bring in a qualified electrician.
Yes, a simple fixture replacement may be suitable for an experienced DIYer, provided local regulations permit it. New circuits, complex wiring, or uncertain existing wiring should be handled by a qualified electrician.
There is no universal mounting height. The correct height depends on the required coverage, beam angle, mounting surface, glare control, and target area. Test the beam position at night before final tightening.
They need protection appropriate to their installation environment. Select a fixture specifically rated for the actual outdoor exposure and follow the manufacturer’s installation requirements.
Usually, the beam should be directed toward the intended target rather than unnecessarily upward or toward people’s eyes. The final angle depends on the fixture’s optical distribution and mounting height.
There is no single correct lumen value. A driveway, entrance, warehouse perimeter, and backyard require different illumination levels and beam distributions. Choose based on the area being illuminated rather than wattage alone.
Common causes include loose connections, an unsuitable driver, incompatible controls, unstable supply voltage, or a failing fixture. Turn off the circuit before inspecting electrical connections.
LED fixtures generally offer high efficacy, controllability, and long operating life. DOE notes that LED technology can reach 150 lm/W or more in specialized applications, although actual fixture efficacy depends on the complete luminaire rather than the LED chip alone.
For how to install an outdoor flood light, the physical mounting is usually the easy part. The details that determine a reliable installation are circuit isolation, proper grounding, weather protection, secure mounting, optical aiming, and selecting a fixture whose performance matches the application. For commercial exterior projects, SEEKINGLED can provide LED flood lighting solutions suited to different outdoor environments.

How far apart should LED high bay lights be spaced? Learn practical spacing guidelines based on ceiling height, beam angle, and real industrial layouts.
View details
IECEx certified floodlight solutions for hazardous industrial zones. Discover certification requirements, performance benefits, and safe operation in explosive atmospheres.
View details
Need to know how to change outdoor led light bulb safely? This practical guide shows simple steps, tools, and safety tips for porch, garden, and flood lights. Learn the right way with SEEKINGLED.
View details
Explosion proof light fixture for Zone 1 & 21 hazardous areas. ATEX & IECEx certified LED floodlight delivering 150 lm/W, 100,000h lifespan and rugged IP66 safety.
View details